Empire TIME - Lesson 2
Recording Expenses
Empire TIME enables users to record, track, and manage time and expenditures.
Getting Started
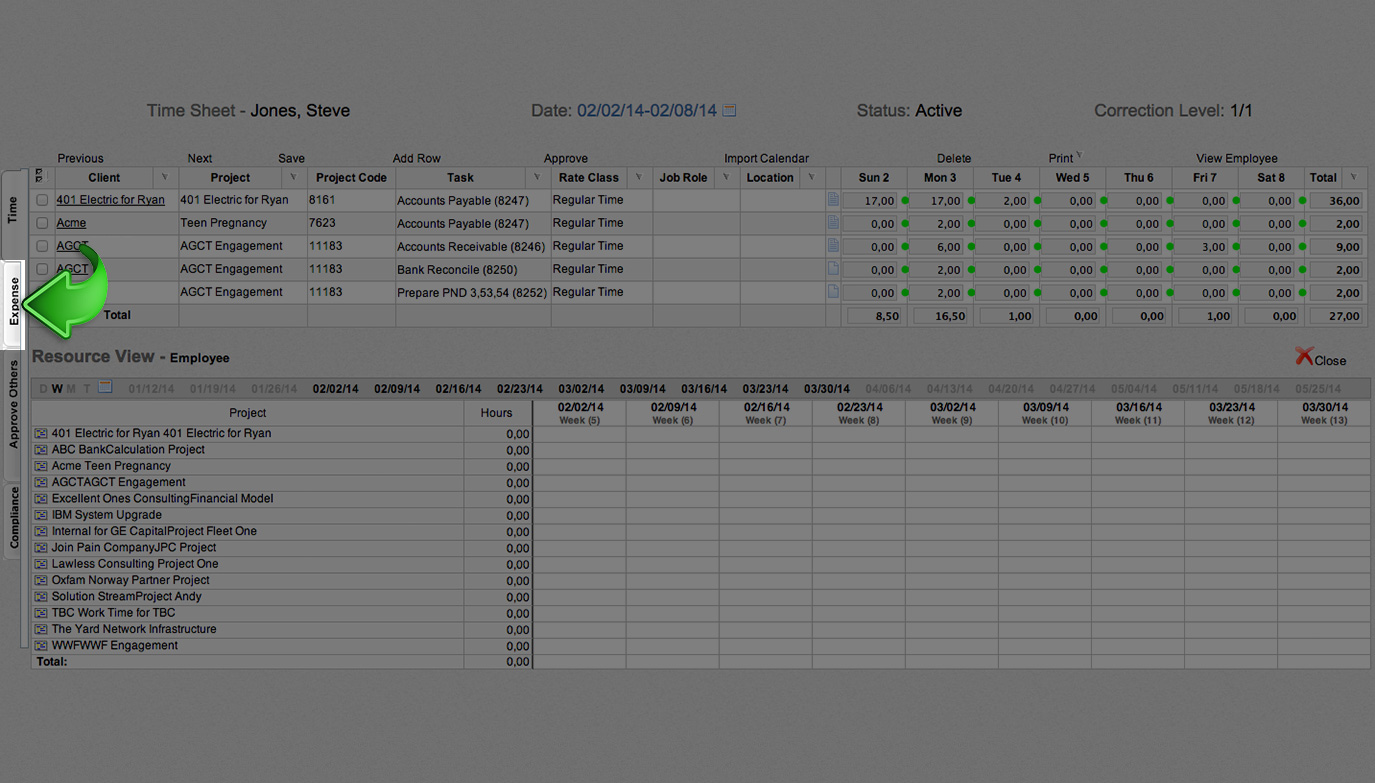
To begin, click the “Time” tab. This takes you to your main interface, which provides tabs for time entry, expense entry, management approval, and compliance.
Go to Your Expense Interface
Click the “Expense” tab located on the left side of the window. This will take you to your Expense Sheet.
Add Expense Information
Fill in the expense details.
Client/Project: Click on the appropriate Client/Project from the list of options. (If you do not see the correct Client/Project, then it is not yet in the database and will need to be created in Empire PROJECT.)
Expense Type: Classify the expense type by choosing from the options provided: air fare, hotel, gas, etc. (You can input a custom classification if applicable.)
Payment: Select the method of payment used for the expense: cash, check, or credit card.
Location: Input where the expense was incurred.
Currency: Input the currency used for payment.
Date: Input the date of the expense.
Amount Incurred: Input the total dollar amount of the expense.
Rate: Typically 1, unless the expense was ongoing or hourly.
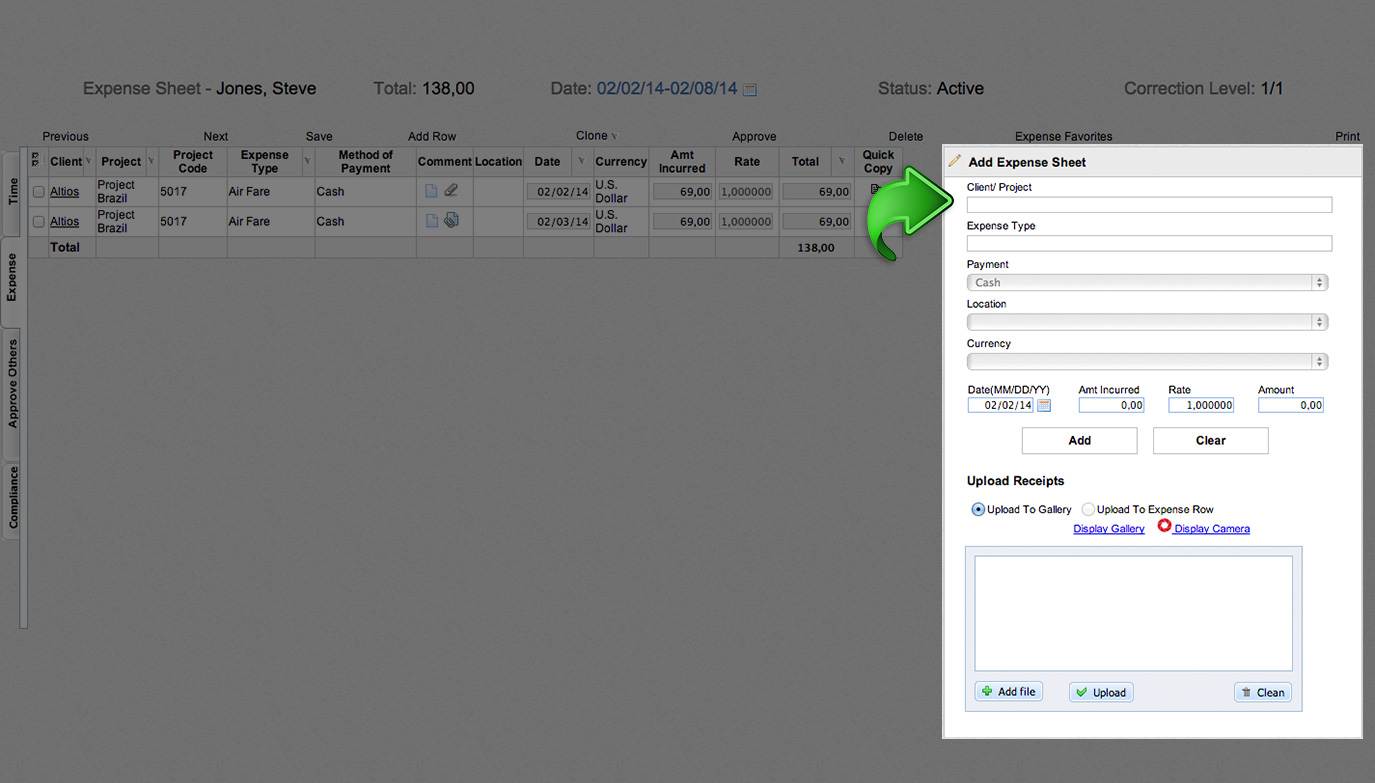
Upload Receipts (optional)
Click “Add File” beneath the primary box. This will allow you to upload photos of receipts. Alternatively, you can email photos of your receipts to receipts@wsg.com; they will automatically be added to your receipt gallery.
Click “Add” to save your data, or click “Clear” to discard your data.
